Fruity Pebbles & Lucky Charms Rice Krispie Bars
No Bake | 20 Minutes | Crowd Pleaser
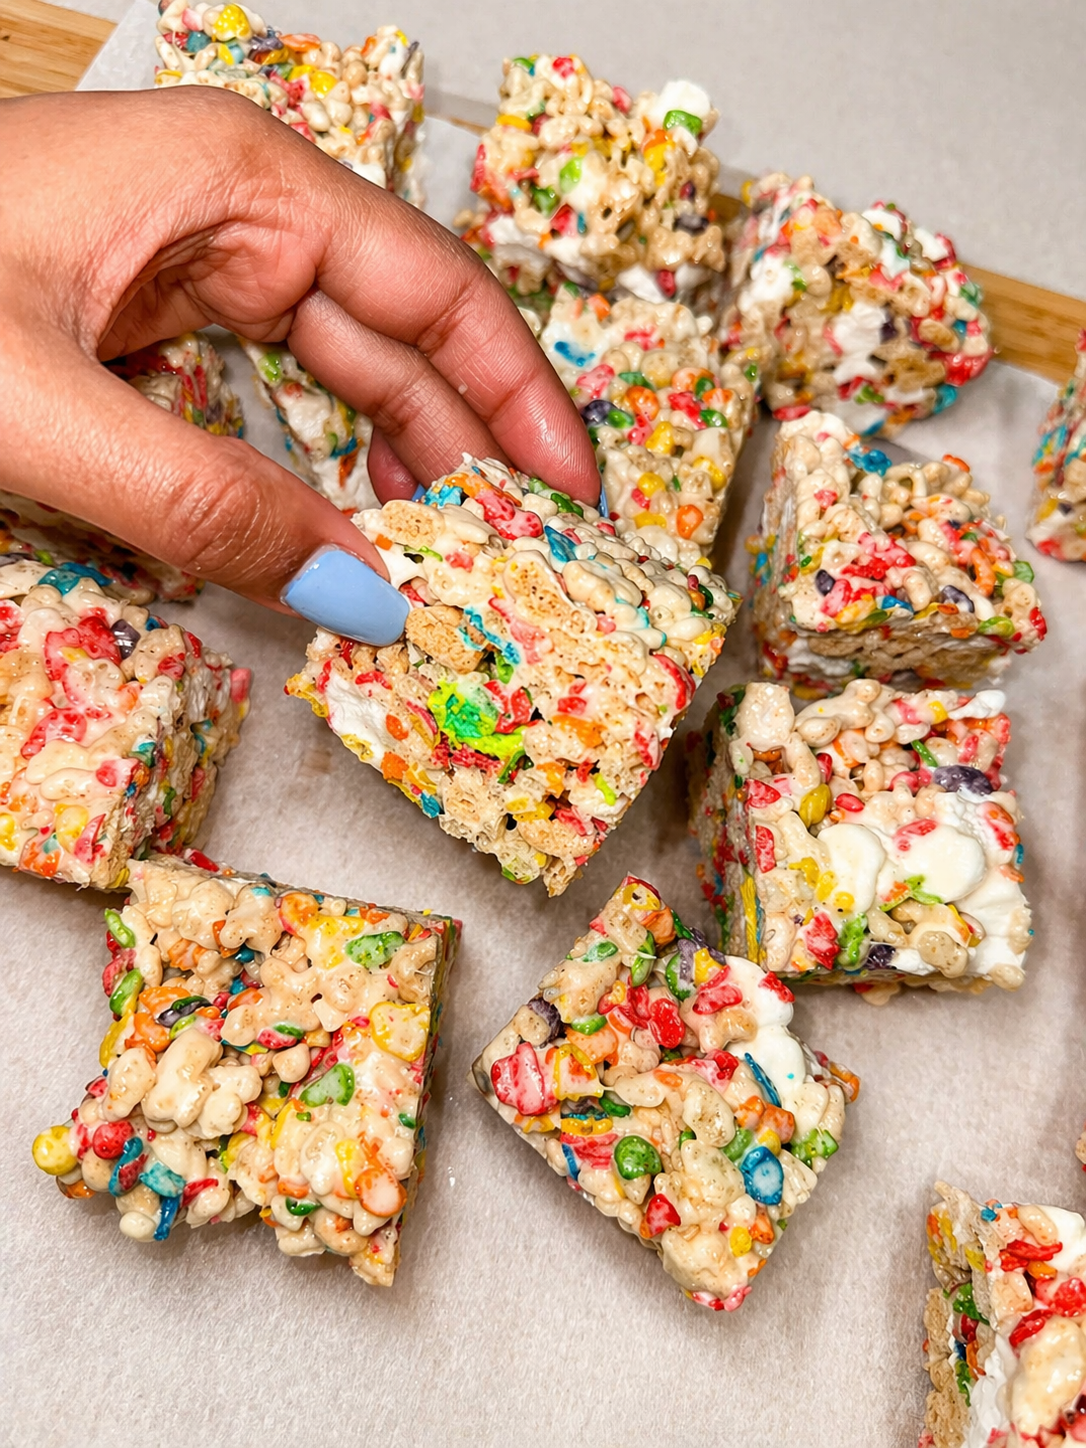
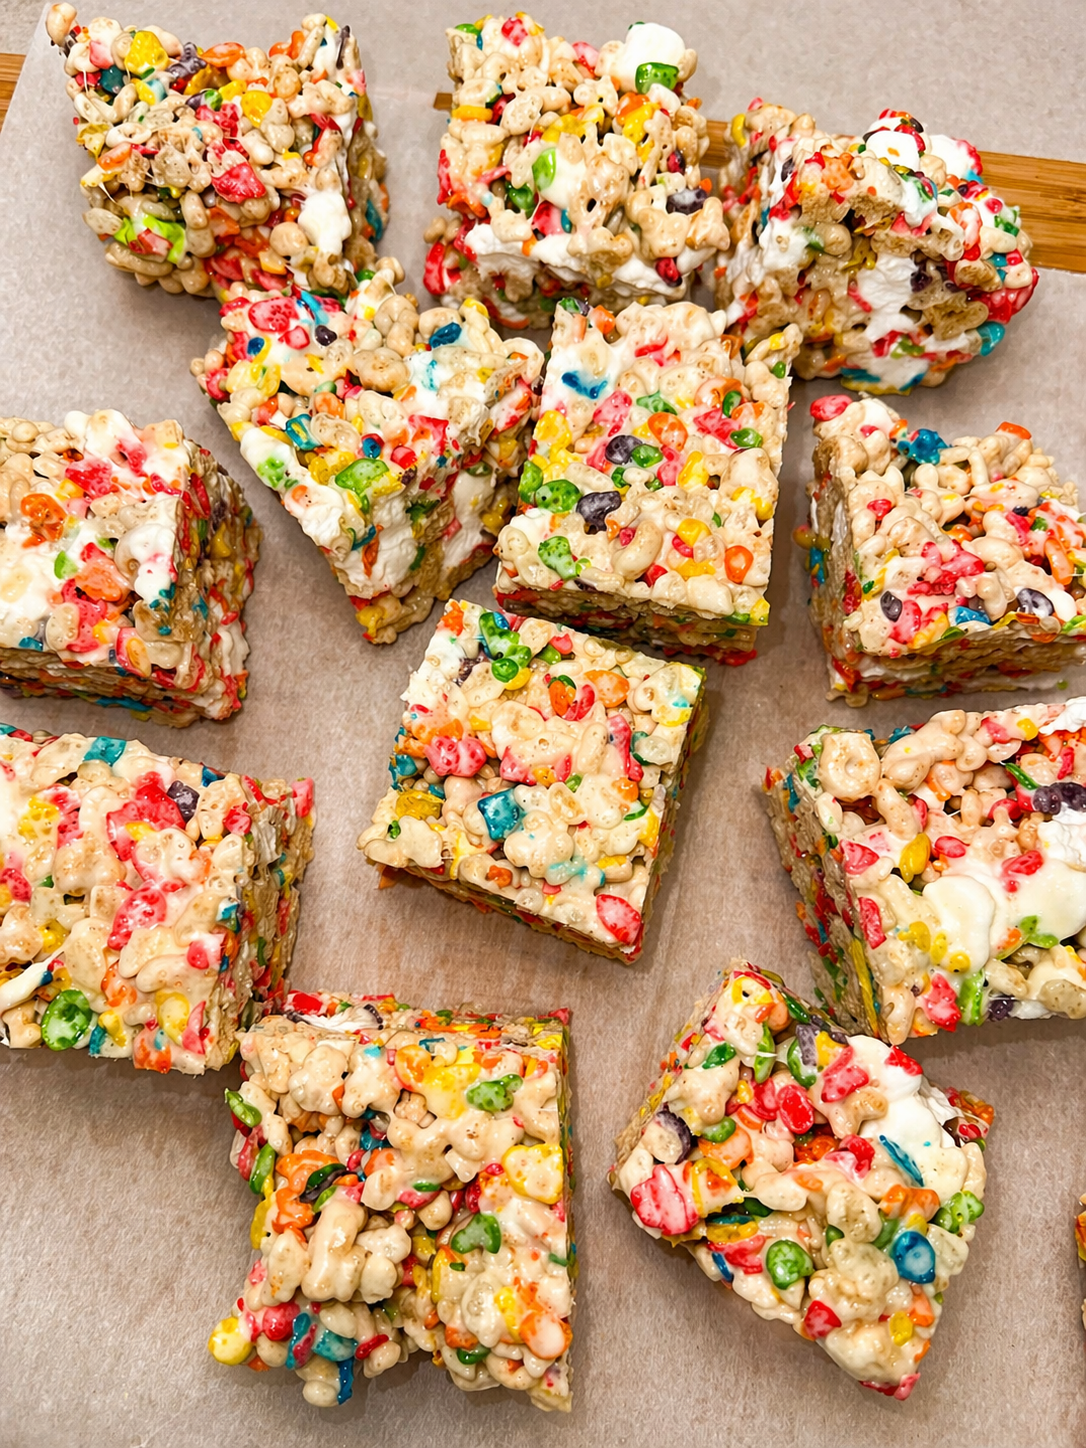
Some recipes are pure joy in bar form — and this is one of them. These are not your standard rice krispie treats. Three cereals, two types of marshmallow, one pot, and twenty minutes stand between you and the most colorful, nostalgic, impossibly chewy bars you have ever made. The Fruity Pebbles bring that bright fruity sweetness, the Lucky Charms add little pops of magic in every bite, and the Rice Krispies give you that signature crispy chew that makes a rice krispie bar a rice krispie bar.
The secret is the reserved marshmallows — holding back some and folding them in at the end gives you those gorgeous visible marshmallow pockets that make every bite different. One pan, no oven, done in under 90 minutes including setting time. These are the bars that disappear at every gathering before anything else does.

Why You'll Love These Bars
No oven required — melt, mix, press, done. The easiest recipe on this blog and one of the most crowd-pleasing.
Three cereals, triple the fun — Fruity Pebbles, Lucky Charms and Rice Krispies together create a flavour and texture combination that is so much better than any single cereal alone.
The marshmallow pocket trick — reserving marshmallows and folding them in at the end gives you visible gooey pockets throughout. This is what separates a great rice krispie bar from a basic one.
Ready in 20 minutes active time — the rest is just waiting for them to set. You can make these an hour before guests arrive and they will be perfect.
Incredibly nostalgic — Lucky Charms and Fruity Pebbles are pure childhood. Every single person who tries these smiles immediately.
Perfect for gifting — they cut cleanly, travel well and look absolutely stunning with all those colors. Wrap individually in cellophane for a gorgeous gift.
Customizable — swap the cereals based on what you have. All Fruity Pebbles, Cocoa Pebbles, Cinnamon Toast Crunch — this base recipe works with almost anything.
Ingredients You Need
Full ingredients with measurements are in the recipe card below.
Salted butter — the salt in the butter balances the sweetness of the marshmallows and cereal. If you only have unsalted, add a generous pinch of fine sea salt when you add the vanilla. Do not skip the butter even though this is a no-bake recipe — it adds richness and helps everything bind together.
Large marshmallows — these go in first and melt down completely into the base. Fresh marshmallows make a significant difference — the softer and fresher they are, the stretchier and chewier your bars will be. Stale marshmallows make dense, dry bars.
Miniature marshmallows — you use most of these in the pot but reserve 2½ cups to fold in at the end. This two-stage marshmallow method is the most important technique in this recipe. The reserved marshmallows stay whole and create visible gooey pockets throughout the bars.
Vanilla extract — added off heat so it does not cook off. It rounds out the sweetness and adds warmth. Do not skip it — it makes a noticeable difference to the overall flavour.
Fruity Pebbles — the star of the show. They bring bright fruity sweetness, colour and a slightly crispier texture. They soften faster than Rice Krispies so the ratio matters — too many and the bars lose their chew.
Lucky Charms — the marshmallow pieces add little bursts of sweetness and those beautiful colours throughout. They also add a slightly different texture from the cereal pieces. Use them generously — they are what make these bars look magical.
Rice Krispies — the structural backbone. They hold their crisp longer than Fruity Pebbles and give you that classic rice krispie bar chew. If you want to go all-out Fruity Pebbles you can swap these out but the bars will be sweeter and slightly less structured.
Tips for Making the Best Rice Krispie Bars
Fresh marshmallows are non negotiable — squeeze the bag before buying. It should feel soft and pillowy. A hard or stiff bag means stale marshmallows and dense dry bars.
Low heat the whole time — high heat scorches the butter and makes the marshmallows sticky and grainy. Keep the heat as low as possible and be patient.
Stir constantly while melting — marshmallows stick and burn incredibly quickly if left unattended. Keep stirring from the moment they hit the pot.
Remove from heat before adding vanilla — vanilla added to a hot pot loses its flavour. Pull off the heat first then stir in the vanilla.
Work quickly once the cereal goes in — the mixture starts to set as soon as it hits room temperature. Have your pan lined and cereals measured before you start.
Fold gently, do not stir aggressively — treat the cereal mixture like a delicate batter. Aggressive stirring crushes the cereal and makes the bars dense.
Reserve those marshmallows — set aside your 2½ cups before you start. This step is not optional if you want the gooey pockets.
Use cooking spray on your hands — the mixture is incredibly sticky. Spraying your hands before pressing makes the job 100 times easier.
Press lightly — a gentle press is all you need. Pressing too hard compresses everything and makes the bars dense and hard rather than light and chewy.
Give them the full hour to set — cutting too early means the bars fall apart. If in a hurry, refrigerate for 30 minutes instead.
Use a sharp knife and clean cuts — wipe the blade between cuts for the cleanest edges.
Eat them the same day — these are at their absolute best within a few hours of making. The cereal starts to soften overnight.
How to Store
Same day: These are genuinely at their best the day they are made. The cereal is at peak crunch and the marshmallows at peak gooey. Try to serve within 4–6 hours of making.
Room temperature: Wrap tightly in plastic wrap or store in an airtight container at room temperature for up to 2 days. Do not refrigerate — the cold makes them hard and dry.
Individual wrapping: For gifting, wrap each bar individually in plastic wrap as soon as they have set. This keeps them soft longer than storing together in a container.
Freezer: Not recommended — the cereal becomes soft and soggy when thawed.
Make ahead: These can be made up to 4 hours in advance and kept at room temperature wrapped tightly.
To Make Dairy Free
Swap the salted butter for your favourite vegan butter in equal quantities — Earth Balance, Miyoko's or Violife all work beautifully here. Everything else in the recipe is already dairy free. The bars will taste just as good and nobody will know the difference.
Recipe
Prep Time: 20 mins · Setting Time: 1 hour · Total Time: 1 hour 20 mins · Yield: 12 bars · No Bake
Equipment
9 x 9 inch baking pan
Parchment paper
Large nonstick pot

Ingredients
5 tbsp salted butter
6 oz large marshmallows
10 oz miniature marshmallows — reserve 2½ cups (120g) for folding in at the end
2 tsp vanilla extract
2 cups Fruity Pebbles cereal
2 cups Lucky Charms cereal
2 cups Rice Krispies cereal
Instructions
Spray a 9 x 9 inch pan with cooking spray and line with parchment paper, leaving an overhang on two sides for easy removal.
Measure out and set aside 2½ cups (120g) of the miniature marshmallows. Keep them nearby — these get folded in at the end.
In a large nonstick pot, melt the butter over low heat. Once melted, add the large marshmallows and the remaining miniature marshmallows — everything except the reserved 2½ cups.
Stir constantly over low heat until completely melted and smooth. Keep the heat low and be patient.
Remove the pot from the heat. Stir in the vanilla extract.
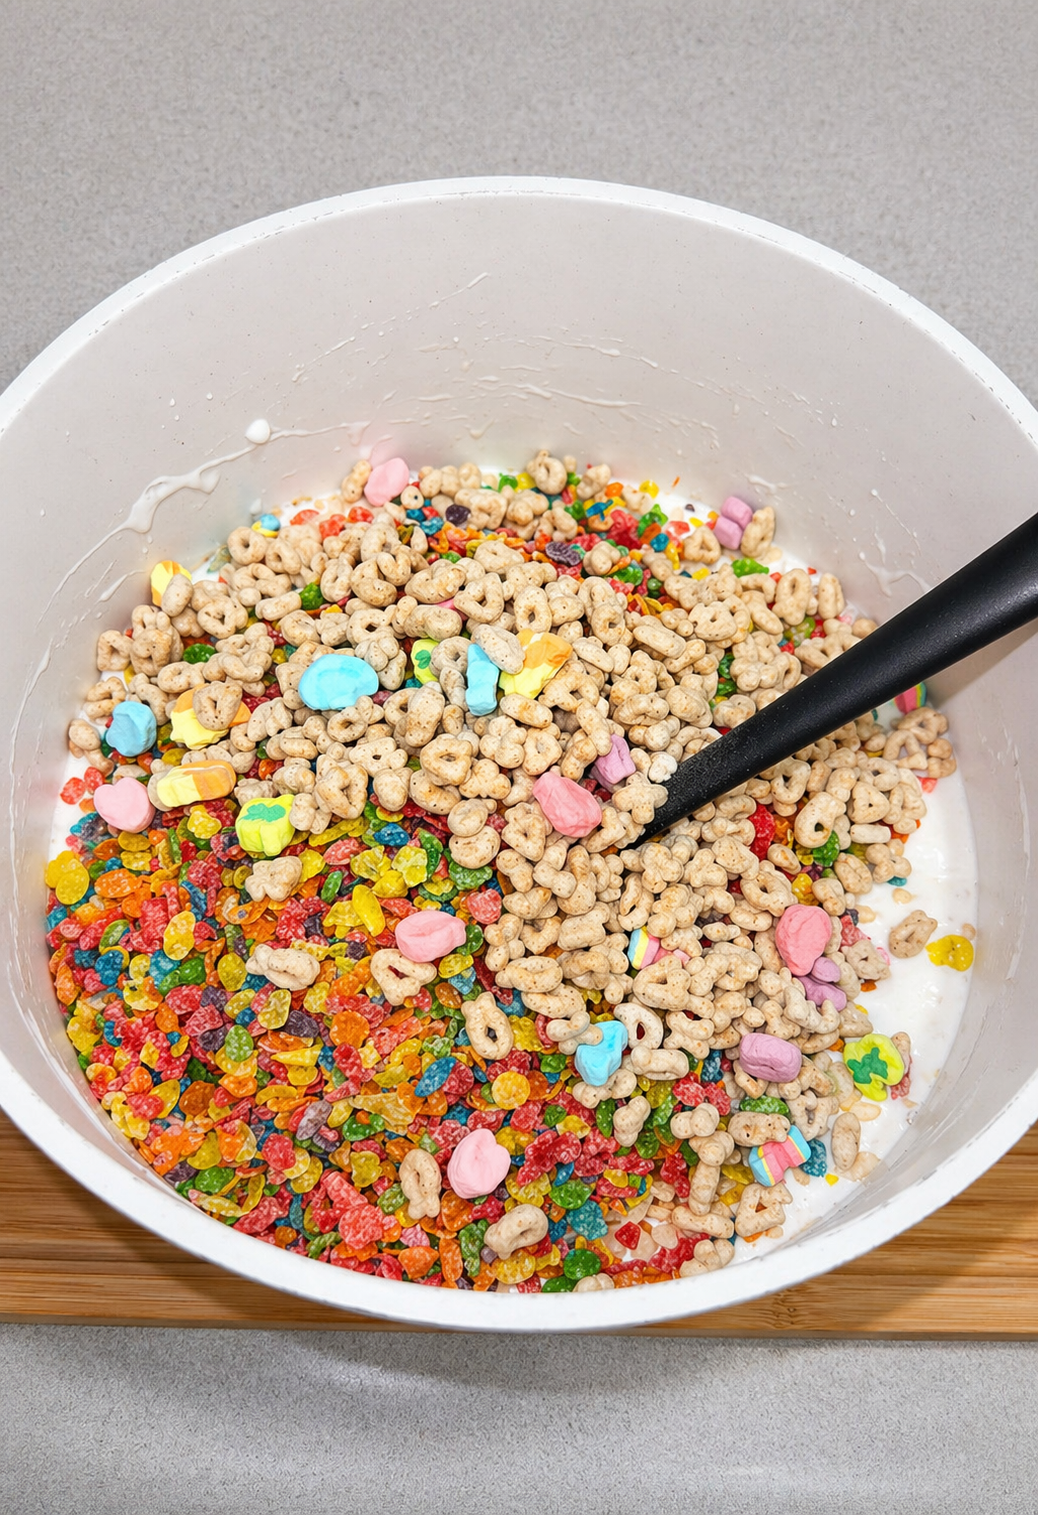
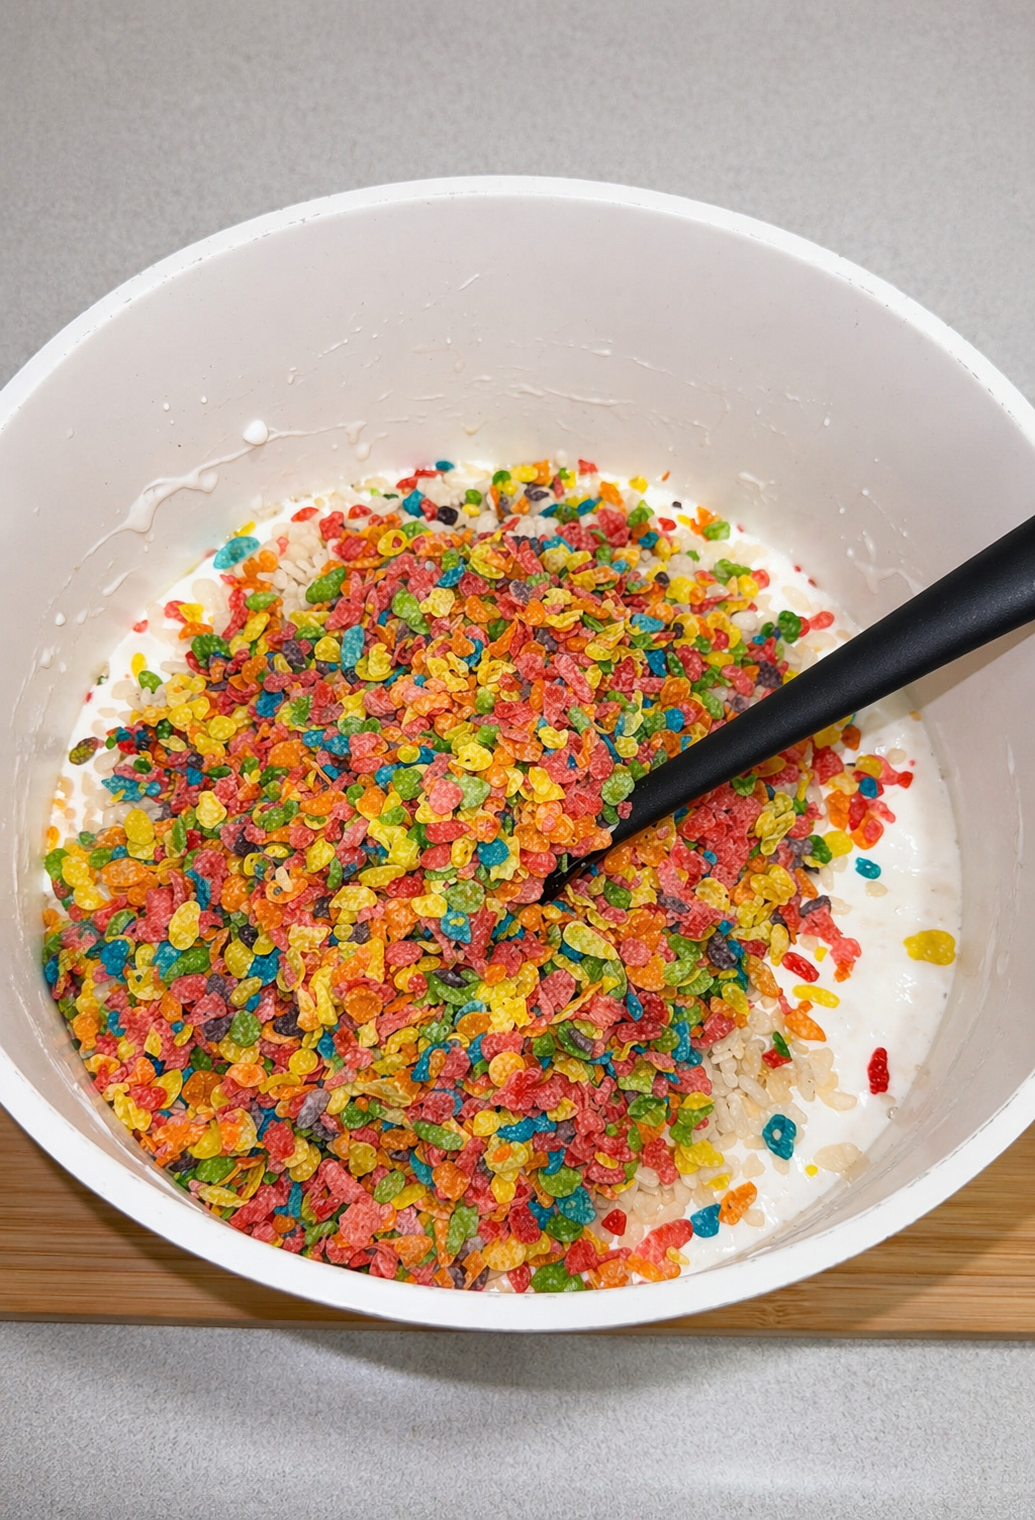
Working quickly, gently fold in the Fruity Pebbles, Lucky Charms and Rice Krispies. Fold gently — do not crush the cereal.
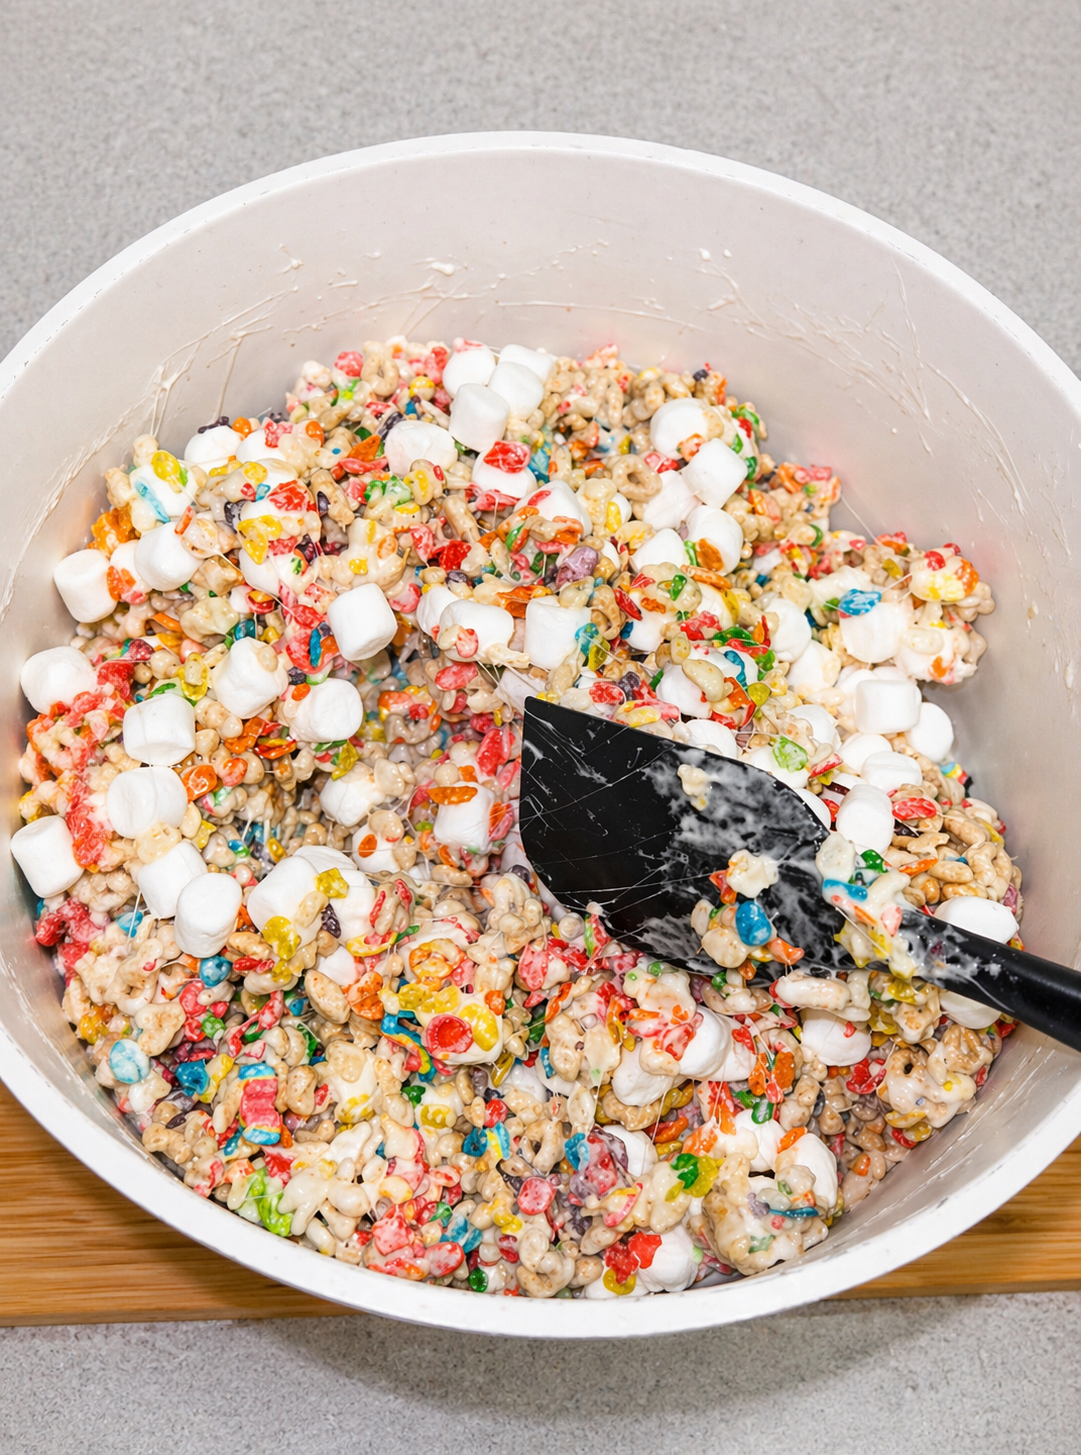
Add the reserved 2½ cups of miniature marshmallows and fold until just combined and evenly distributed.
Pour into the prepared pan. Lightly spray your hands with cooking spray and gently press into an even layer. Press lightly — do not pack it down.
Allow to cool and set at room temperature for at least 1 hour. Do not cut early.
Use the parchment overhang to lift out of the pan. Cut into 12 squares with a sharp knife, wiping the blade between cuts.
Notes
Fresh marshmallows: Softer and fresher is always better. The bag should feel pillowy and soft, not stiff.
Cereal swaps: All Fruity Pebbles works but the bars will be sweeter. Cocoa Pebbles make a great chocolate version. Cinnamon Toast Crunch is another winner.
Storage: Best same day. Tightly wrapped at room temperature up to 2 days. Do not refrigerate.
Gifting: Wrap individual bars in cellophane tied with a ribbon — they look beautiful and travel well.
Happiness is Homemade · saveurbyv.com